You can import reference data from a database by connecting the database to the application. It involves creating a reference table and adding reference columns to it. Reference column values can be imported from the desired columns in the database.
To add reference columns to reference tables, follow these steps:
- Go to Application Menu > Data Catalog > Reference Data Manager.
- Under the Workspace pane, expand the desired reference folder.
- Expand the Reference Tables node, right-click the desired table, and click Alter Table.
- Click
 .
. - Double-click the cell under the Column Name and type the reference column name.
- Click
 .
.
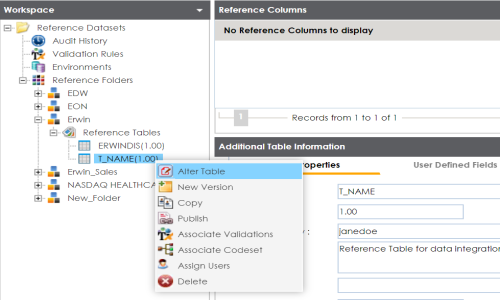
The Alter Table page appears.
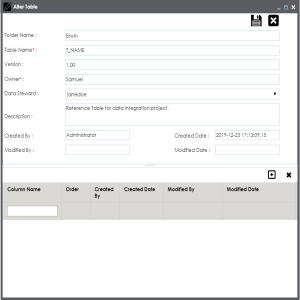
A new row is added to the grid.
Note: You can add multiple reference columns.
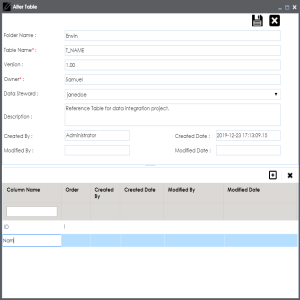
The reference columns are added to the reference table.
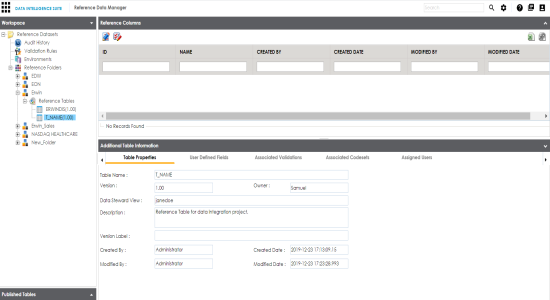
To add reference column values to the reference columns through a DB scan, follow these steps:
- Click
 .
. - Click
 .
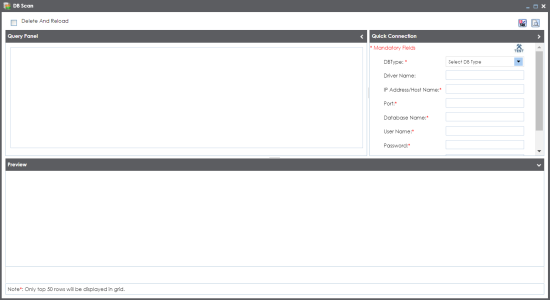
. - Enter appropriate values in the fields in the Quick Connection tab to establish a connection with a database. Fields marked with a red asterisk are mandatory. Refer to the following table for field descriptions.
- Click
 to test the connection.
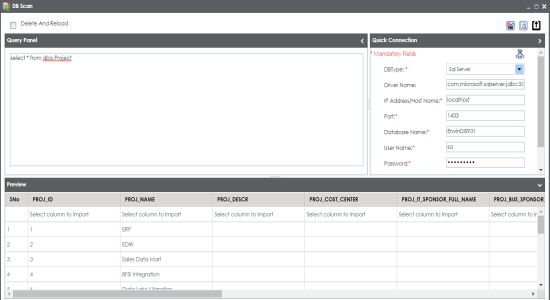
 - Write a query in the Query Panel to pull the data from the database.
- Click
 to validate the query.
 - Click
 to preview the data.
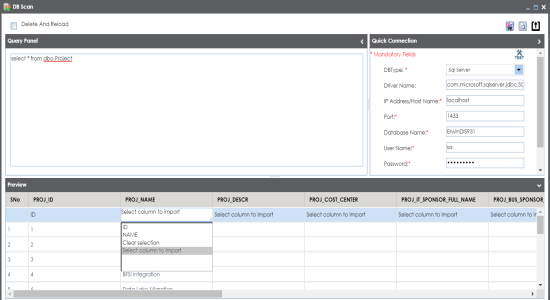
 - Double-click the Select Column to Import cell under the desired column.
- Choose an appropriate <Reference_Column_Name> from the drop-down.
- Click
 .
.
The DB Scan page appears.
|
Field Name |
Description |
|---|---|
|
DB Type |
Specifies the database type. For example, Sql Server. |
|
Driver Name |
Specifies the JDBC driver name for connecting to the database. For example, com.microsoft.sqlserver.jdbc.SQLServerDriver The field is autopopulated based on the DB Type. |
|
IP Address/Host Name |
Specifies the IP address or server host name of the database. For example, localhost. |
|
Port |
Specifies the port to connect with the database. For example: 1433 is the default port for a Sql Server database type. |
|
Database Name |
Specifies the database name being used to connect to the reference table. For example, ErwinDIS931. |
|
User Name |
Specifies the user name to connect with the database. For example, sa. |
|
Password |
Specifies the password to connect with the database. For example, goerwin@1. |
If the connection is established, the success message appears.
The data is previewed.
A drop-down option appears displaying the reference columns.
Note: You can import multiple columns from the database.
The column values from the database are uploaded into the selected reference columns.
|
Copyright © 2020 erwin, Inc.
All rights reserved.
|
|